
It’s a tradition in some companies to ring a bell when a substantial sale is made and, with the advent of the Internet of Things (IoT), I felt this tradition needed bringing up to date. Literally “Ringing the Bell” is a great motivational approach (as described here) as it brings everyone in the organisation into the celebration of success in winning business. This tradition also compliments the Stock Market bell ringing tradition where the CEO of a newly IPO’d company gets to ring the market-opening bell.
A company I chair, DevicePilot have been working recently with Sophie Carter who is a fantastic sales leader and she suggested to me that it might be nice to have a bell in the DevicePilot office so that sales could be announced and celebrated. I loved the idea and wanted to do something appropriate to an IoT company so I set to work on a connected sales bell!
Ringgit!
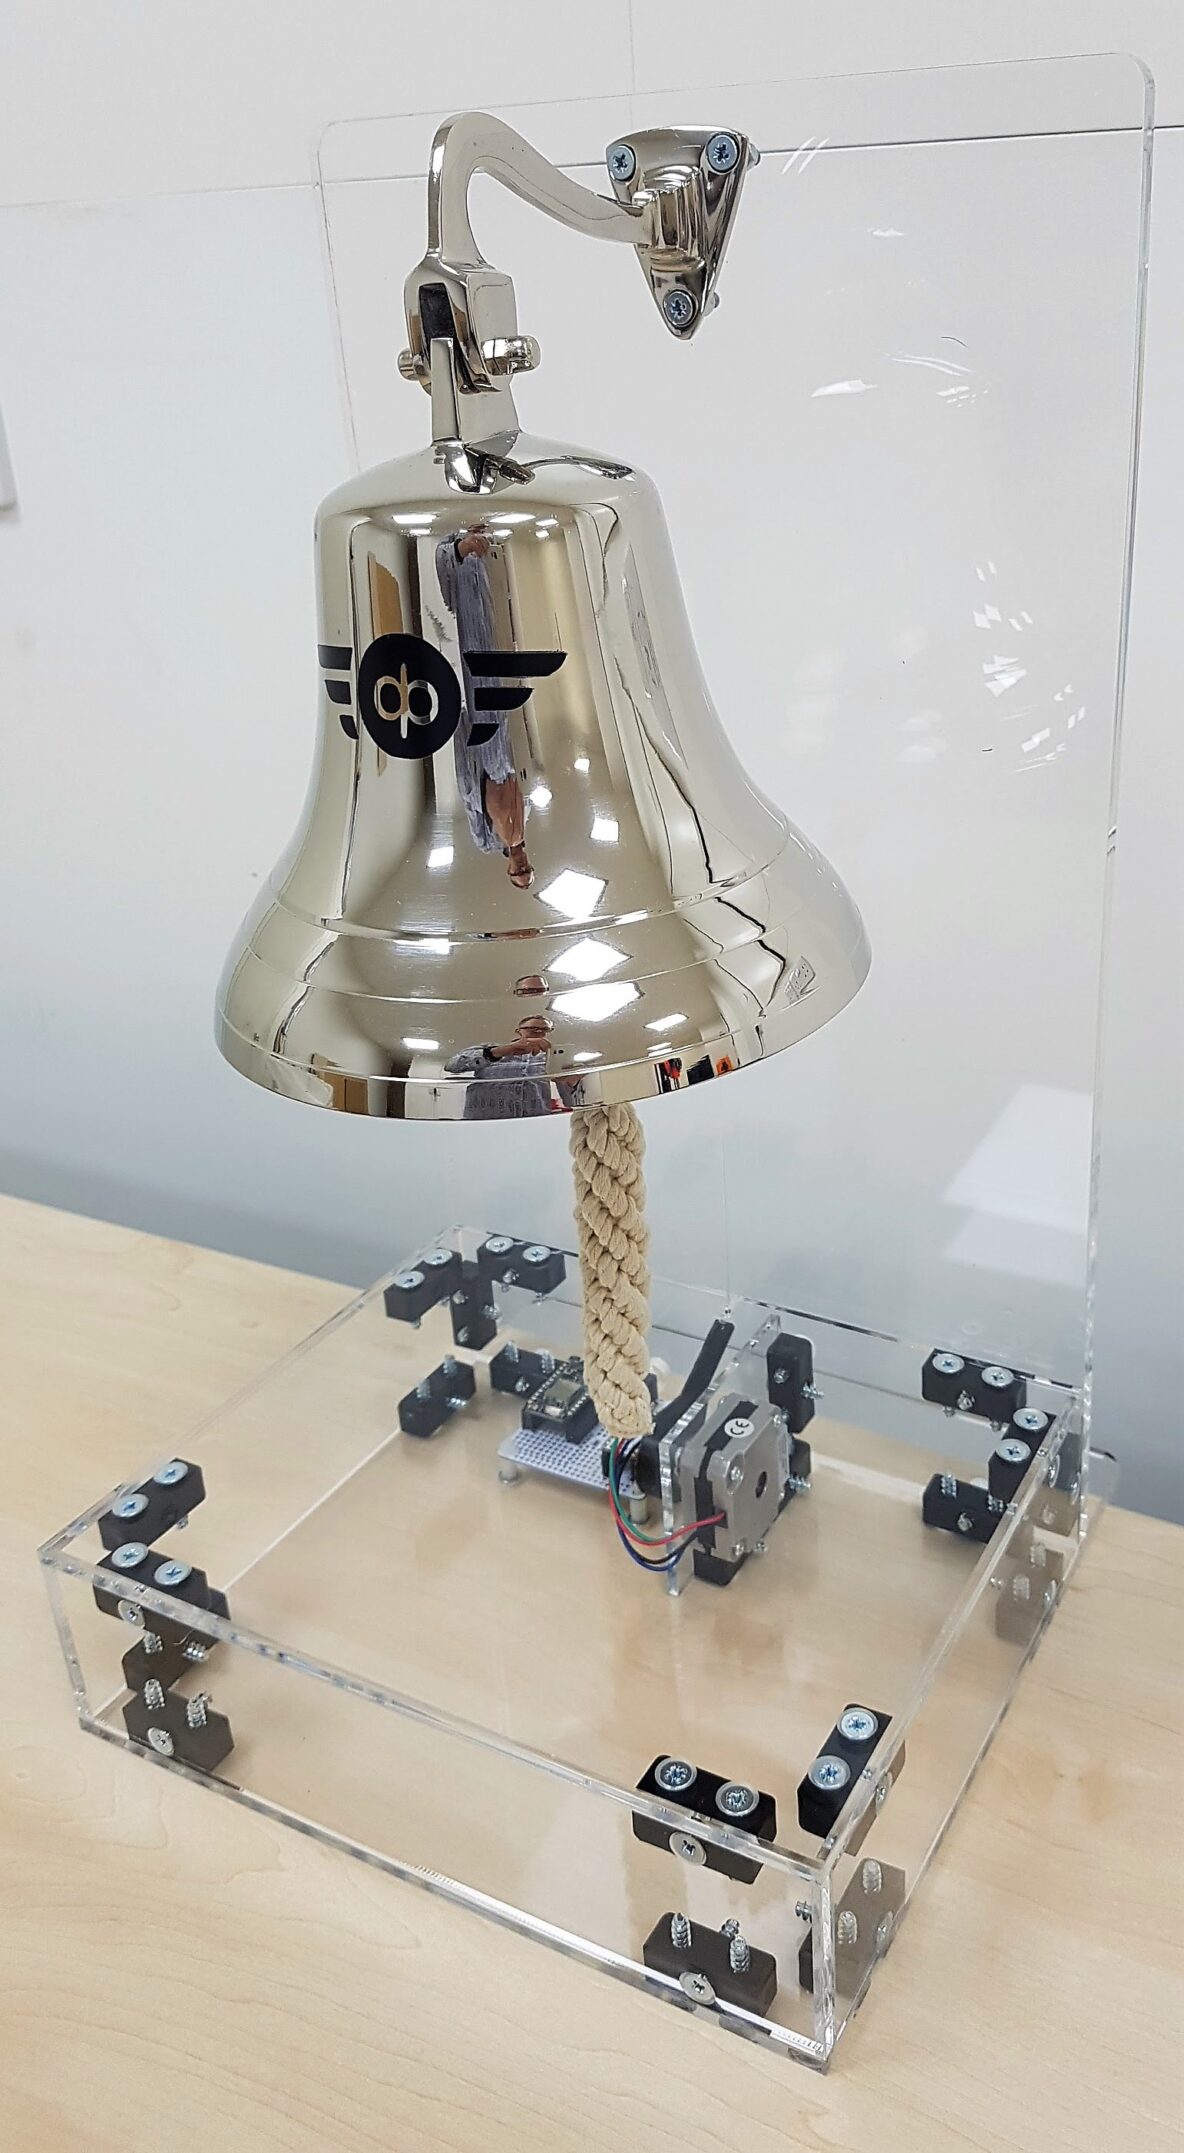
The end result of my efforts is a decent looking chrome last-orders bell sourced from Amazon for around £35 mounted on a clear acrylic (perspex) stand. I don’t think it will look out of place in the DevicePilot offices and I’m hoping it ends up sitting next to their dashboard – which shows, on a large screen, the kind of company metrics many SaaS companies display in the office to keep everyone on the same page.
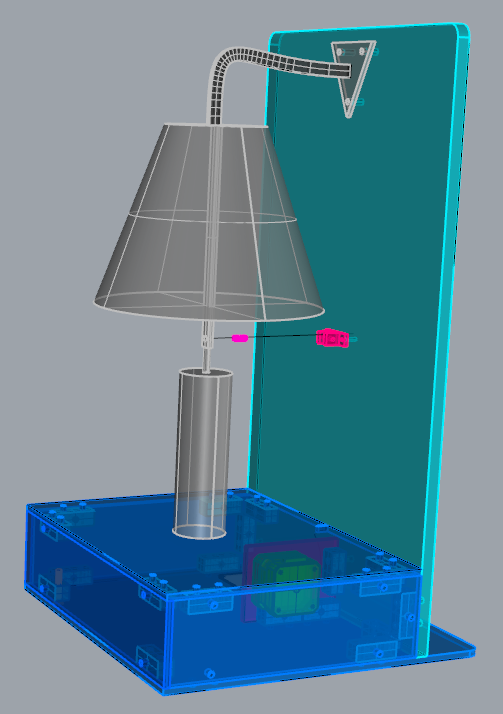
Since I used clear acrylic for the construction it’s obvious that it isn’t just a regular bell stand as you can see the motor and electronics – but (as I describe below) a stealth version could be built easily enough.
My aim was to make a bell that could be automated to ring when an event occurs such as setting a deal above a certain value to completed status in a CRM or a tweet with a particular hashtag being sent. Fortunately this kind of automation is simplified by services like IfThisThenThat (IFTTT) and there is a description below of how to enable this in IFTTT.
I delivered the final unit to DevicePilot a couple of weeks ago and I’m happy to say it was rung for the first time in earnest the following week – so well done to them on their sales success. The delivered unit supports a number of different bell-ringing methods including:
- Using an IFTTT integration:
- for instance to a CRM tool like Salesforce or HubSpot – this is the approach DevicePilot are planning
- to twitter or similar, for instance tweeting the hashtag #showmethemoney on a linked twitter account – see below
- Pressing the big “Ring the Bell” button on the device’s web page
- Using the Particle cloud directly through the Particle console – which also allows you to get notifications of when the bell has rung
- Doing it the old way and using the bell cord!
Hardware
There will certainly be easier ways to get a bell to ring than the solution I’ve built but my criteria included some things that ruled out a few simpler approaches (like just tapping a bell with a solenoid):
- I wanted it to look as much like traditional sales bell as possible – which is generally like a ships bell in my experience
- Ideally I wanted it to be easy to ring the bell manually as well as electronically
- I wanted the process to be fairly quick to implement as I don’t have a lot of time and I wanted it to be ready soon after we discussed the idea
- It had to be built from parts I had lying around
- It would need to be based on a decent IoT platform to simplify firmware updates and allow connectivity such as ringing the bell in response to a tweet
- I needed to be able to make it using tools and equipment I already have

Box construction and “hidden” ringer cord
I thought a little about whether it should be obvious that it had an IoT function or work in stealth mode – hopefully the design I’ve built would allow either approach – if it was built with an opaque acrylic base then it could work in stealth mode as the thread the pulls the clapper is fairly hard to see (it is transparent cord and hidden behind the bell).
Since I’ve been focused on 3D printers and other stepper-motor driven robots recently it is those parts that I have most readily available. I like making things with a combination of acrylic sheet (good rigidity, fast to make even large parts & accuracy of working – using a laser cutter – but limited to planar designs) and 3D printing (great for complex but relatively small shapes). I also worked out a good technique for creating strong box sections using acrylic sheet and “modesty blocks” which is described in my DelBot post. I took this approach a little further by using self-tapping screws to secure the modesty blocks and this allows an enclosed box to be created as there is no need for access to fix nuts onto the bolts I used in the 3D Delta.
In the end the only parts I needed to order was the bell itself and the self-tapping screws to hold the base together.
The PCB I used is one that I designed a while ago using EasyEDA and called PiStepperHat because it can work with a Raspberry Pi as well as a Particle compatible device like the Photon I used. It supports up to 3 stepper motors via Pololu compatible carriers but I jjust used one for this design. The motor is assumed to be in the idle position by the software when it is started and this is generally a safe assumption as gravity pulls the bell-pull towards the middle position (which elevates the ringer lever until it touches the top panel) and the motor to the neutral point.
Software
The software is a modification of the RBotFirmware that I’ve been working on for various connected projects including the sand table that I built a while ago. It’s perhaps a little bit of an overkill for just ringing a bell but the advantage of using that code is that it supports a web interface, cloud connectivity (using the Particle cloud) and, where available by using a Redbear Duo in place of a Particle Photon, bluetooth.
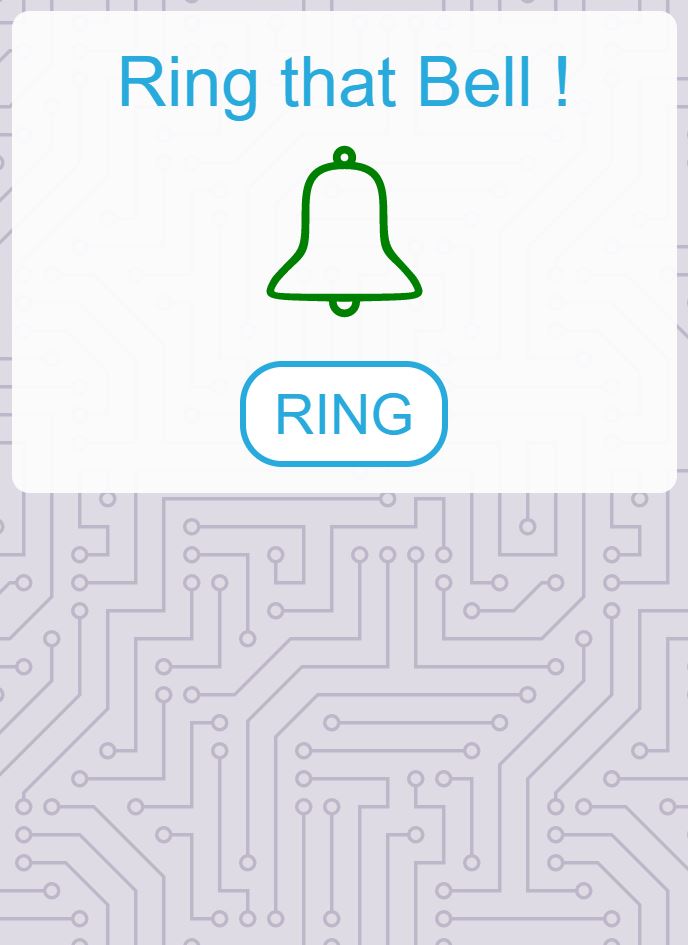
The web interface is particularly helpful, especially for testing, as it provides a big button that can be used to trigger the bell ring. I’ve found that by making this page available offline in my mobile browser I can cause the bell to ring through the Particle API even when the device isn’t able to serve the web page directly – i.e. when not on the local WiFi network.
I’ve made use of two Particle libraries that I’ve published. One for a reasonably capable web server (RdWebServer) and a JSON one (RdJson) that wraps the JSMN JSON parsing library.
A nice thing about the Particle Cloud is that you can call a function remotely on a device. To do this the device has to register the function with the cloud and, when that function is called (e.g. directly on the Particle Console website, by a call to the Particle Cloud API or by a third-party service like IFTTT or Zapier) then a call-back function on the device will be passed any parameters specified.
In the case of this project a single function is registered called “exec” and that function expects a single letter parameter which can be “R” for ring the bell. Some additional parameter values are possible too and are documented in the main source code file RinggitTheSalesBell.ino
IFTTT (If This Then That)
To get started with IFTTT open an account on their homepage IFTTT and connect the Particle channel. You will also need to connect to any services you might use to trigger the bell-ring such as Twitter.
You then need to create an Applet. The way to do this is actually via your account name menu at the top-right of the screen which seems a little counter-intuitive to me. But in any case you get to a view with the text shown below:
![]()
Click on “+this” and you see a list of services (including Twitter for instance) that you can use as the source for the trigger. Click the service and then the specific trigger you want: e.g. New Tweet by You with Specific Hashtag. Enter any additional parameters – such as the hashtag you want to use and click “Create trigger”.
Now click on the “+that” in the view that follows and select “Particle” from the services shown. Click on “Call a Function” in the following form and you now get to choose the name of the device that the function will be called upon, the name of the function to call and the parameters to pass to that function.
In my case I had called the sales bell Ringgit in my Particle Cloud account so I selected the following:
- Ringgit
- exec
- R
For these three items. You can add an additional /2, /3 or similar after the R parameter to ring the bell that many times instead of just once.
Click Create Action and Finish and that’s it. In my testcase the bell rings within about 15 minutes of me tweeting #showmethemoney. DevicePilot have now implemented a connection to their HubSpot CRM so that the bell rings after a significant deal changes state to completed.
Design, Cuttting/Printing Files and Source Code
All of the design (laser cutting and 3D printing) and source code is here: https://github.com/robdobsn/Ringgit – The Sales Bell
Please let me know if you make one too 🙂 Or even if you think it might be a good idea for a company you know.