
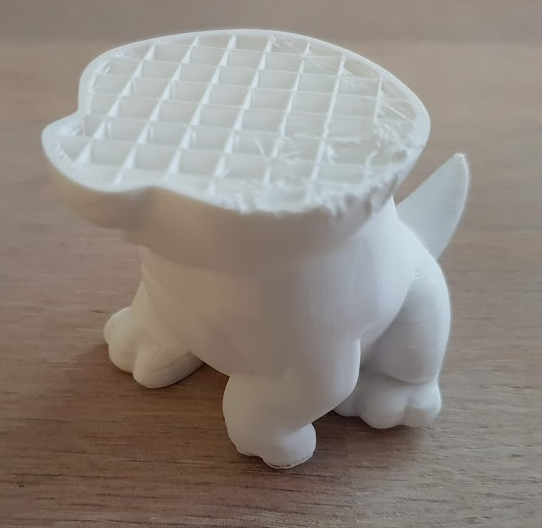
The Creality Ender 3 is a really affordable 3D printer at only around £190 in the UK right now (or £220 for the Pro version). So I assumed when I ordered one that the review I’d just read, which raved about print quality and sturdiness, must be off by a wide margin or had been written by the company itself. But boy was I wrong. The first print (a demo file of a dog that came on the SD card) only partially printed (more of that later) – but the print quality was nothing short of amazing – easily equaling the Prusa i3 MK2S that I’ve mainly used.
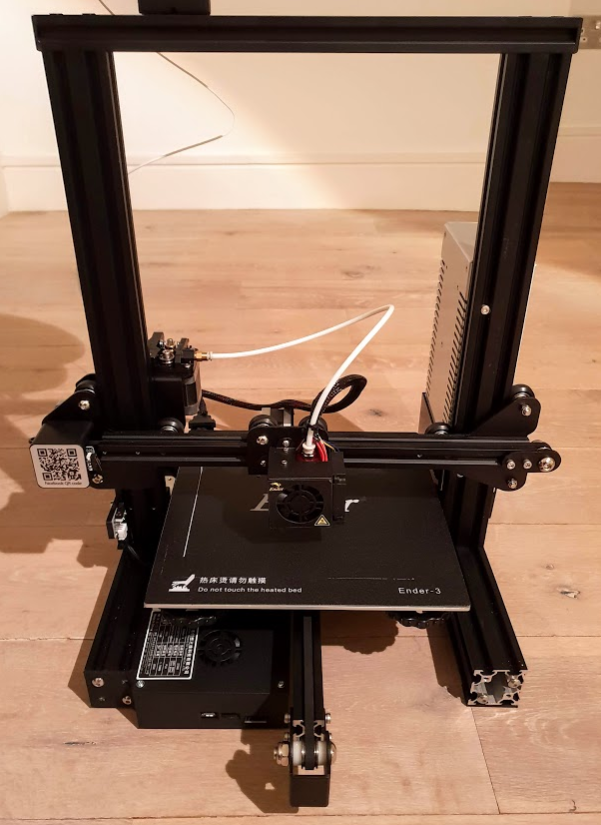
Ender 3 Printer (with “invisible” BLTouch)
In fact the only thing wrong with the printer that I can see is that bed-leveling is a purely manual process involving the thumb-wheels which can just be seen in the above photo under the right-side of the bed (near where it says Ender 3). Unfortunately though bed-leveling is a really important part of 3D printing and manual bed-leveling is a pain. Going back to the bad-old-days of the Ultimaker Original and first-gen Prntrbot (my first 3D printing experiences) wasn’t something I was keen to contemplate.
The Mystery of the Headless Dog
Obviously the first print from the Ender 3 wasn’t ideal – I mean who wants a headless plastic dog? And a little investigation showed that the reason the print had failed was that the dog-model had come free from the bed – not just in one go – but over a period of several layers – which resulted in the base of the dog being quite rounded.
Good adhesion to the bed is critical for 3D prints and the issue for this particular hound was that one section of the base had adhered quite well – and stayed attached all the way up to the layers around its neck – while another part of the base layer had started to detach and curl up – thus pulling more and more of the base layer away from the bed as the print progressed.
I hadn’t used any of the normal means to ensure better adhesion – like using a brim (a thin set of additional material around the base layer to increase its area of adhesion) – or Pritt-sticking the area which also works in some cases (although sometimes makes it really hard to get the print off!). But I had expected that a model with a relatively large base like this mutt-model would have adhered and the most likely reason for this failure is poor leveling of the bed.
So, in summary, the reason the doggy remained headless was that it failed to stick to the bed. And that was, in-turn, due to my poor attempt at bed leveling using the classic “keep going until a piece of paper just about gets trapped under the head” approach.
Getting On the Straight and Level
So, without printing anything else at all, I went in search of any decent bed-leveling technique that someone else had been successful retro-fitting to this particular machine. And there was no trouble there, checking google resulted in many options, but I was drawn to solutions using the BLTouch (or its clone the 3DTouch) for a number of reasons. Firstly, I have already experimented with some other techniques including inductive sensors like the ones Prusa uses (I tried these in a Wilson printer that my friend Chris Greening and I are building with mixed results so far) and resistive ones that I used in the DelBotXL) so I was keen to try something new.
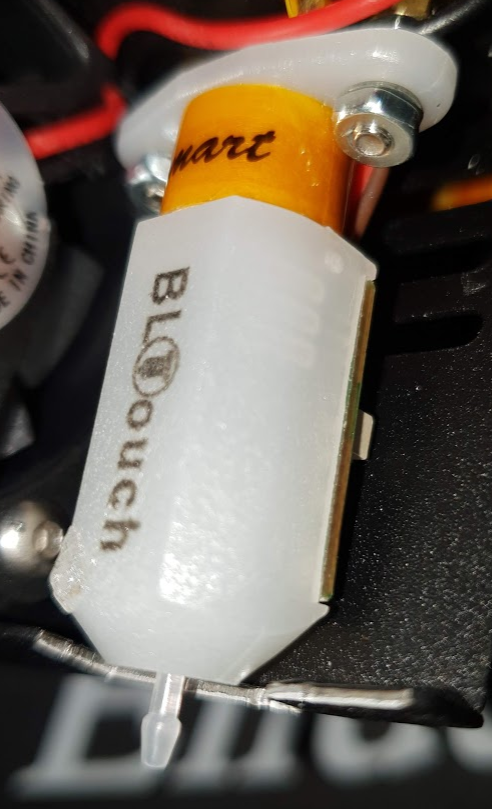
BL Touch Sensor (the eagle-eyed may notice the bit of it I melted)
The second and more compelling reason is that the BLTouch is small and self-contained and doesn’t require a specific bed material to work. This is important for the Ender 3 (although maybe not the Pro? which I think has a magnetic bed) as the bed on a basic Ender 3 is some kind of fibre-glass material and therefore I think inductive sensors (in particular) would not work (although there is aluminium underneath so it might).
Furthermore, it was easy to find a bunch of tutorials on adding a BLTouch to the Ender 3 and some good YouTube videos showing the entire process. However, one thing I didn’t like about a lot of the common methods for adding a BLTouch was the extreme distance between the sensing point and the hot-end nozzle – in many cases over 40mm. This means that the area that can reasonably be probed is reduced by some amount as the travel of the carriage doesn’t allow the probe to get to all the points the head can reach.
A Better Spot for the Probe
I decided to investigate further options and disassembled the hot end cage a little – actually just removing the two screws circled in the photo in fact – revealed quite a large space in which I was sure a BLTouch could be hidden away.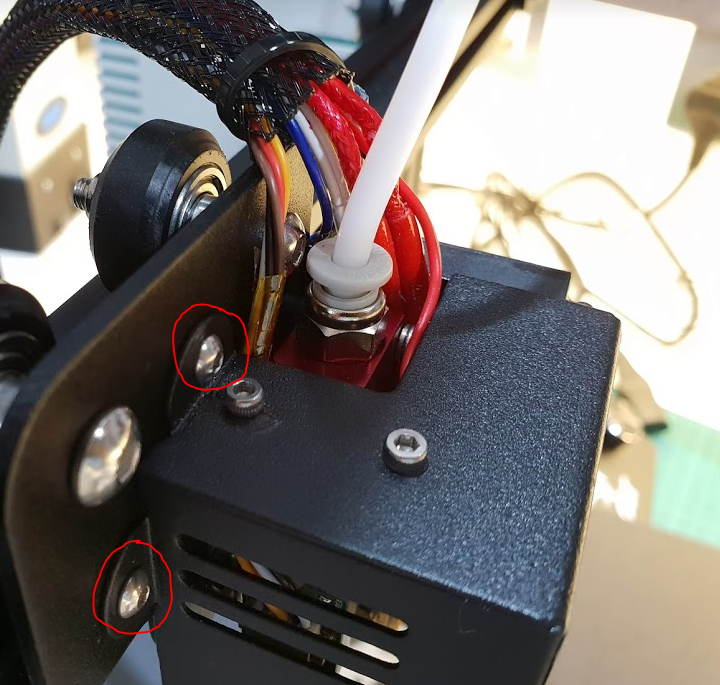
DISCLAIMER
You MUST take care if you are going to follow the approach I’ve taken that the BLTouch is not too close to the hot-end. I will accept no responsibility or liability related to 3D printers going up in flames because of this modification. You must decide for yourself if you think this is a good idea and only do it if you are certain there is no risk.
What I found is that the BLTouch can be mounted inside the hot-end cage quite simply with only a little drilling and filing to be done to allow for mounting. The dimensions that I would use if I were to do it again (which are a little different from what I used but give more space between the hot-end and the BLTouch) are shown in the figure below.
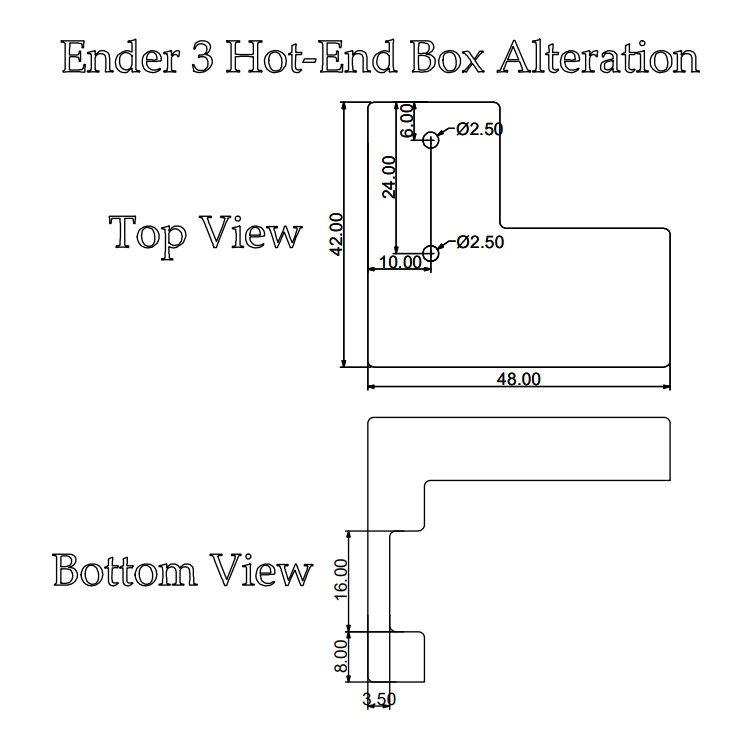
Two operations are required:
- Drilling two mounting holes for the BLTouch in the mild-steel cage at the positions indicated in the top part of diagram above
- Cutting or filing away a section of the bottom part of the cage to allow the BLTouch to protrude
Please note that you should not take dimensions from the photos as I positioned the BLTouch closer to the hot-end than is desirable (hence the melted bit you can see in photos). I would strongly recommend placing the BLTouch at least 5mm from any part of the hot-end.
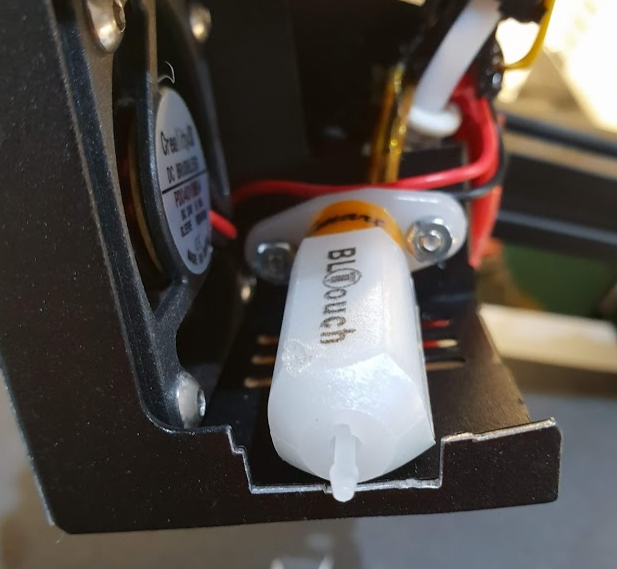
Cutout for the BLTouch to protrude through
Mounting the BLTouch
Mounting the BLTouch is done with brass pillars and additional washers and nuts as shown. The parts are all M2.5 size. What worked for me was the following for each of mounting points (washers, etc are described from right to left in the picture below):
- M2.5 16mm cap-head (hex) machine screw
- M2.5 locking washer
- M2.5 6mm brass threaded mount
- M2.5 nut (around 1.75mm thick)
- BLTouch
- M2.5 locking washer
- M2.5 nut
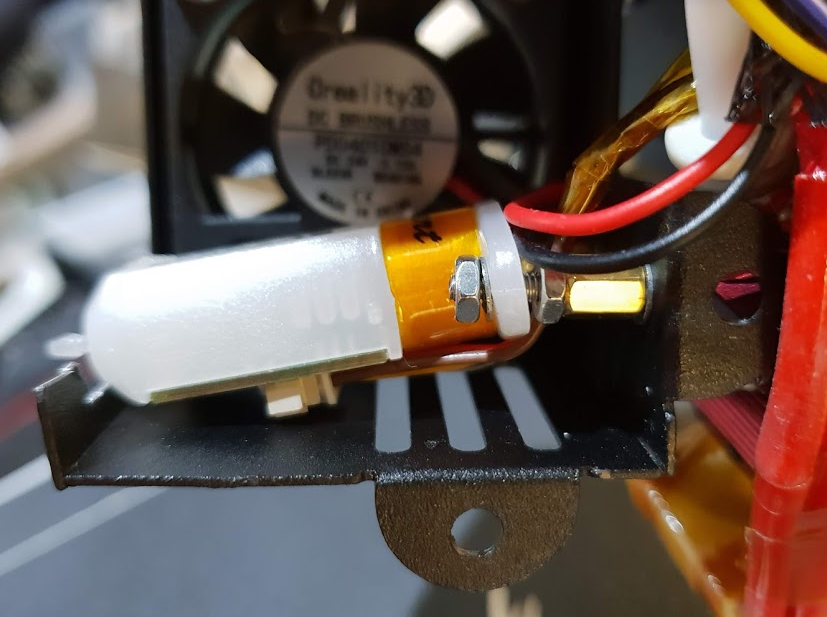
Obviously you need to tighten the nuts up. Don’t just leave them like this!
This worked well for me and resulted in the bottom of the BLTouch body (when mounted vertically) being just about level with the bottom of the hot-end box. You may need to make some adjustments (e.g. replacing the extra nut with washers) to get it right for your printer.
Firmware Woes
Getting this far seemed so easy. I had routed the cables for the BL Touch in the way described in the videos and got everything connected without issue. Then came the job of upgrading the firmware on the controller board to handle the BLTouch probe. Again there’s a good video that explains this process. The only thing is that the control board in the BLTouch is rather weedy and has a very limited amount of Flash available for the 3D printer control program (which is generally a flavour of Marlin). The video explains that this forces some compromises and that’s where I started to smell trouble ahead.
I pressed on and got everything working only to find that the compromise suggested in the video – which trades menu items for bed-leveling really didn’t work for me. Over time I’ve become used to printing remotely (either over WiFi in the case of my DelBotXL which uses the Duet WiFi board) or using an SD card and the sneakernet. Having to have the printer attached to a PC the whole time is actually a bit of a drag and since the standard Ender 3 isn’t WiFi enabled it really meant only using the printer in a connected mode.
So that was a bit of a showstopper and I left the printer for a month or so while trying to decide what to do. My options were as follows:
- See if there is a drop-in upgrade for the Ender 3 control board with more Flash
- Find an different type of control board that has more Flash memory and will fit the space available
- Use Octoprint or similar on a dedicated Raspberry Pi to control the printer.
- Get used to the compromise the video suggests or find an alternate compromise that trades some other functionality and brings the menus back
- Give up and go back to bed-leveling manually
Option 5 sounds like quitting and option 4 seems to have been debated a lot but nobody seems to have come up with a better compromise than already made. So I tried to research option 1 some more and found some people talking about building a better Ender 3 control board but nobody I could find seems to have one as yet.

Duet WiFi board replacing the Ender 3 controller
Option 3 is probably a good idea and I maybe should have stuck with that but I got thinking about how much I like the Duet WiFi and I decided I really ought to try one out. Since my friend Chris had one sitting in my basement I decided to ask if he’d mind me trying it out in the Ender 3.
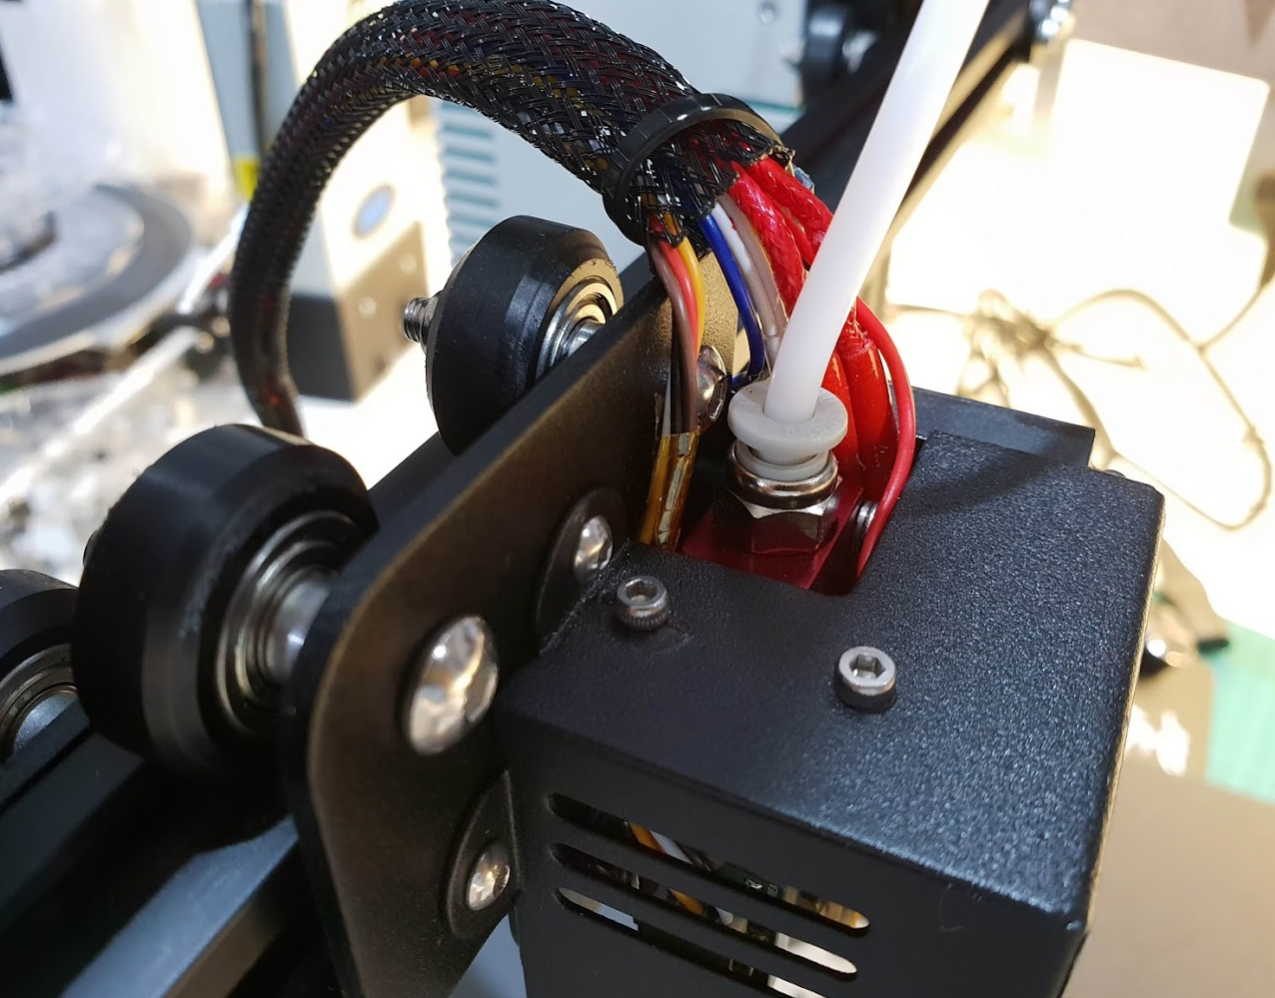
The connectors used on the Ender 3 are different from those the Duet WiFi is designed for but I managed to get them to fit well enough to work (although I have now changed them). The twisted wire you can see at the top of the picture is the BLTouch cable and it attaches to pins on the extension port as described in the Duet WiFi documentation.
Turns out that it works extremely well! Perhaps that’s no surprise as it is an extremely capable board and not the cheapest either. In the end I’ve added around 60% to the original price for the printer but I do have a WiFi capable unit with extremely good bed levelling!
Closing Up
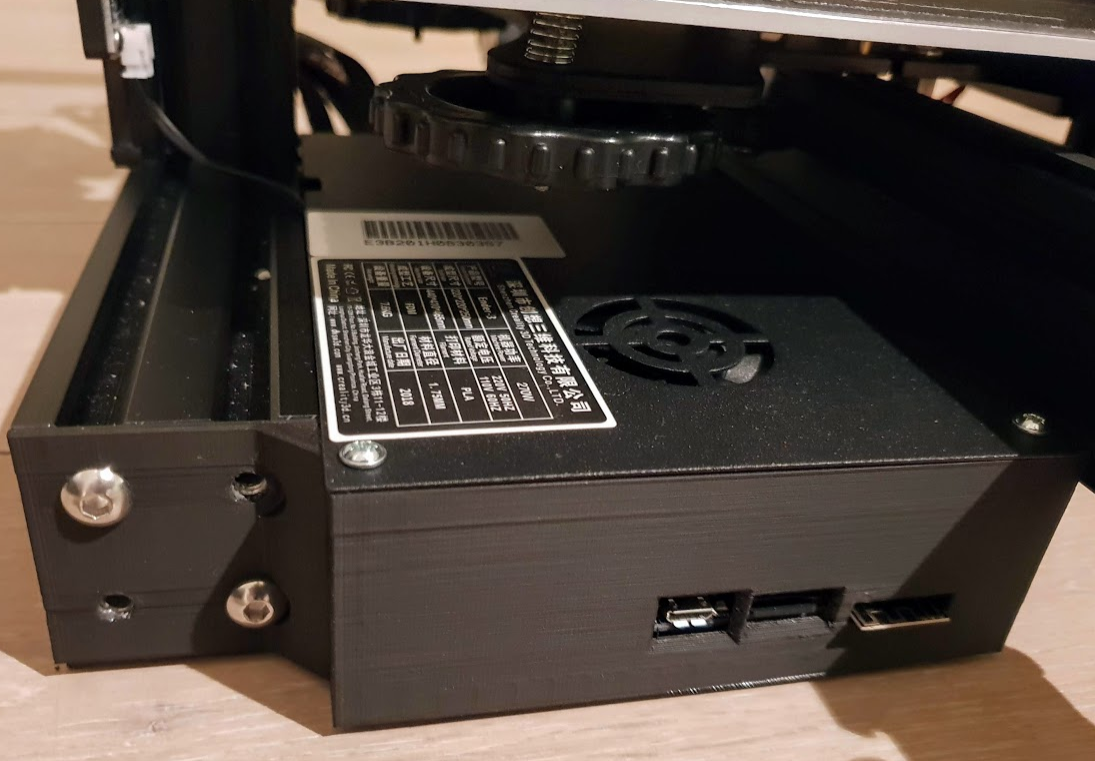
The only issue remaining was that the board is rather exposed and is larger than the original so the case doesn’t fit anymore.
A quick bit of work with Rhino 3D and I had a design for a 3D printed replacement – which incorporates the original top plate and retains the cooling fan for the electronics. So the final result is that it looks like it was meant to be like this.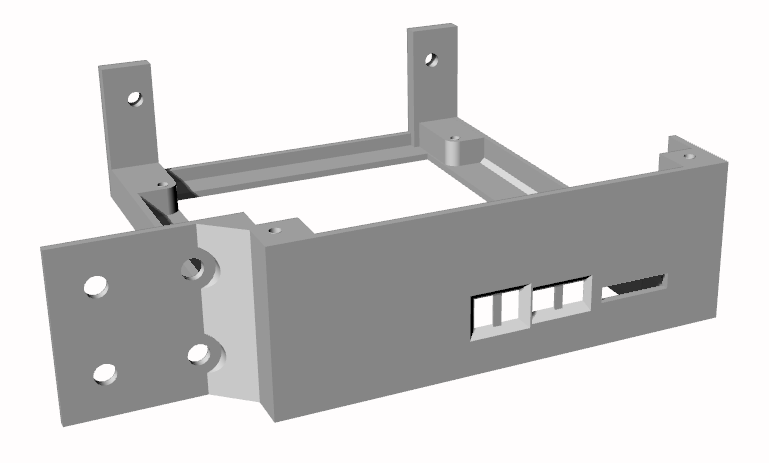
And this is the completed upgrade:
All the design files and configuration files are on GitHub.
Enjoy!