We live in a neighbourhood with a lot of cats, many of which are quite large and fearless. Unfortunately our two moggies are the biggest wusses on the planet – hence they get beaten up on regular basis. Even the larger of the two had to be treated for an abscess on a war wound recently.
So I’ve been thinking about a solution…
Step 1 was to get a good cat flap to stop the undesirables coming into the house. Amazingly we found that cats were able to force their way into most of the cat flaps we tried (Sureflap and Staywell ones) – the big cats (even smaller ones) just learned to push really hard and the plastic flap distorted sufficiently to pop the catch. But, after a lot of research and testing we’ve found one (PetMate Elite) which is strong enough that it hasn’t been forced open – yet.
That shifted the problem but now the gangsta cats simply sit in wait outside the cat flap until our cats have to come out. The baddies have also learned to “pseudo tail-gate”: when our cats get curious and come too close to the cat flap to see if the coast is clear our cat is detected, the cat flap unlocks and this allows the big bad cat to make an entrance and eat all the food.
I’ve learned all this not by hanging around the kitchen patiently waiting for a cat fight, but by installing a camera on the wall next to the flap and monitoring the comings and goings on recordings. I chose a location that makes the whole area around the flap visible and, using iSpy CCTV software, I’ve built up a record of quite a lot of nefarious activity.
So now to Step 2 … detecting the bad cats and deterring them from coming around by squirting them with water.
The idea being that if the immediate area around the cat flap was a safe-zone for our cats they should be able to find a route to avoid running straight into the enemy. A challenge though would be to make sure that the recognition of the animal and subsequent deterrent action was performed quickly enough – i.e. before the cat had walked on by.
Video of the deterrent action is here on YouTube
Isolating the Cat (Dog)
I’ve been mulling this for quite a while now and it became clear that our recent holiday to Australia might provide me with some time to learn more about neural networks and try out some tests with real data. I downloaded a ton of the video I’d recorded before I left and made sure I had some reading materials for the plane.
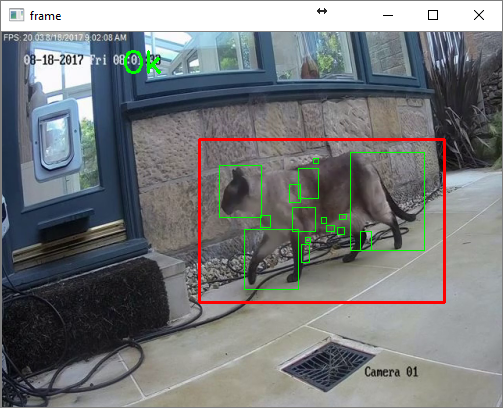
The first step was to extract individual frames from the video and detect movement to isolate the animal in question. I started with code from one of Adrian Rosebrock’s excellent series of OpenCV tutorials. This made it a simple task to acquire an image from video and uses the difference in two frames to identify motion. Then I used contour detection (as per the article) but combined the largest contours into a rectangle of a sensible size and shape – discarding smaller features and ones that weren’t likely part of the animal in question.
# Resize, gray and blur
frame = imutils.resize(videoFrame, width=500)
gray = cv2.cvtColor(frame, cv2.COLOR_BGR2GRAY)
blurred = cv2.GaussianBlur(gray, (9, 9), 0)
# Handle reference
if self.referenceFrame is None:
    self.referenceFrame = blurred
    self.debugTimer.end(1)
    return (self.boundsInvalid_NoReference, frame, None, None, None)
# Calc abs difference between frame and reference
frameDelta = cv2.absdiff(self.referenceFrame, blurred)
thresh = cv2.threshold(frameDelta, 25, 255, cv2.THRESH_BINARY)[1]
self.referenceFrame = blurred
# get contour of motion
(validBounds, boundsCoords, contours) = self.findBoundingRect(thresh, True, 10, (10,10,90,90), (5,10,95,90))
if validBounds != self.boundsValid:
    self.debugTimer.end(1)
    return (validBounds, frame, boundsCoords, None, contours)
(x1,y1,x2,y2) = boundsCoords
It took me quite a few attempts to find a combination of contour detection and image manipulation to get to a point where the cat was isolated in a cropped frame most of the time.
Online Detection
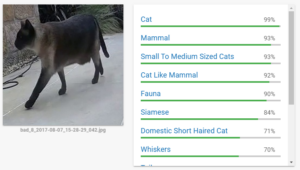
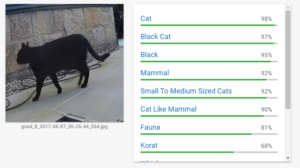
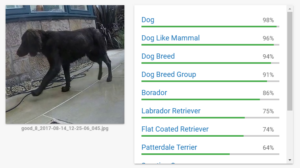
It figures that the next step is to find a means to detect the different cats in the images. I’d previously played with Google Cloud Vision and I was pretty confident that it would do a good job of recognition. I wasn’t mistaken!
The quality of this online tool is amazing and I probably could have continued on this path as it seems pretty quick too. But in the back of my mind I felt that it might not be easy to get the turn-around time I would need to squirt the cat while it was actually still present. I timed cats walking across the scene and realised that in many cases I only had around a second or so to make a decision and fire.
Local Detection Using ImageNet
Google made quite a bit of noise when it open-sourced the machine learning library Tensorflow. One of the Tensorflow tutorials builds a model called Inception 3 and trains it using a database of readily available, categorised images called ImageNet. This library includes a number of kinds of cat and I wondered if the pre-trained model available on the tutorial page might be able to do the work for me. I integrated the code for into my frame grabbing program to see if I could make something that would go all the way from extracting frames from video to recognising the kind of cat it was looking at.
Initial results with Inception V3 / ImageNet seemed very promising. It recognised the breed of cat in more than 50% of cases and I’d also read that it is possible to significantly improve the accuracy by retraining just the later stages of the network with your own images.
Before I went to that trouble though I decided to take a look at how long this particular network was taking to provide an inference result and whether I thought that was workable for a real-time cat deterrent. As it turns out, at least on the hardware I was using while travelling (a Surface Book with i7 6600 processor), the performance wasn’t good enough to be viable. And even on my home machine (an i7 6600K with GTX 970 GPU) it would probably be too slow for a fast moving cat.
| Inference | Lookup | |
|---|---|---|
| Core i7 6600 no GPU | 480 ms | 180 ms |
| Core i7 7700 no GPU | 204 ms | 84 ms |
Note that I am using elapsed time rather than a proper profiling approach so these results need to be taken with a pinch of salt – but they are adequate to show that it isn’t really fast enough to do frame-by-frame processing in this way. It is also interesting to note that GPU acceleration doesn’t seem to make any difference to the inference stage – indeed if these results are correct it actually makes things slightly slower although that might just be experimental differences.
Training a Local Net
What the Inception 3 / ImageNet experiment did provide me with was a good way to automate creation of training data. I used the results it provided to categorise (and rename) around 2600 files extracted from the video feeds with an indication of whether this was a “good” or “bad” animal. I then did a manual cleanup to ensure the training data was pretty much spot-on.
I decided to see how hard it would be to train a simpler model from scratch and if that might give sufficient accuracy without taking so long to process each image. I found a great post on building and training a convolutional neural network to distinguish cats from dogs – i.e. to respond “cat” or “dog” when presented with an image of one or the other. The model the author uses is much simpler than Inception 3 but clearly it does well with the cat vs dog problem so I figured it might be sufficient for my challenge.
I copied the author’s second (five convolutional layer) model – on the basis that the first (2 layer) model hadn’t been sufficient for the cat vs dog challenge and what I was attempting would probably be similar. I then changed the code to keep the colour information (I found that I was unable to tell some of the cats apart myself without the colour info) and started the network training on my laptop while on a flight. I hadn’t managed to get the GPU acceleration running on my laptop before boarding so I didn’t have too high expectations for how far the training would get.
convnet = input_data(shape=[None, IMG_SIZE, IMG_SIZE, 3], name='input')

convnet = conv_2d(convnet, 32, 5, activation='relu')
convnet = max_pool_2d(convnet, 5)

convnet = conv_2d(convnet, 64, 5, activation='relu')
convnet = max_pool_2d(convnet, 5)

convnet = conv_2d(convnet, 128, 5, activation='relu')
convnet = max_pool_2d(convnet, 5)

convnet = conv_2d(convnet, 64, 5, activation='relu')
convnet = max_pool_2d(convnet, 5)

convnet = conv_2d(convnet, 32, 5, activation='relu')
convnet = max_pool_2d(convnet, 5)

convnet = fully_connected(convnet, 1024, activation='relu')
convnet = dropout(convnet, 0.8)

convnet = fully_connected(convnet, 2, activation='softmax')
convnet = regression(convnet, optimizer='adam', learning_rate=LR, loss='categorical_crossentropy', name='targets')

model = tflearn.DNN(convnet, tensorboard_dir='log', tensorboard_verbose=3)
But to my great surprise I found that the training process was remarkably quick – taking in total less than 10 minutes for 3 epochs. And, even more remarkably, the accuracy shown on Tensorboard indicated rapid and stable progress to reach over 99% after 6 epochs.
| Computer | Training time for 3 epochs |
|---|---|
| Core i7 6600 | 3 minutes |
| Core i7 6700K | 90 seconds |
| Raspberry Pi 3 | 11 minutes |
Running the Local Net
I quickly hacked together the set of test images that I’d taken from the original set (making sure there was a reasonable spread of the different cats) and was massively happy to find that accuracy was 100% on the small set of 28 test images and that the processing time for each image was only a few milliseconds.
I finally combined this with the image capture program and did some testing on different computers (once back home).
| Computer | Acquire Frame | Motion Detect | Recognise Image |
|---|---|---|---|
| Core i7 6600 | 1ms | 4ms | 3ms |
| Core i& 6700K | 1ms | 3ms | 2ms |
| Raspberry Pi 3 | 8ms | 44ms | 17ms |
A new frame emerges from the camera every 50ms (the camera is set to 20 frames/sec) so even on a Raspberry Pi 3 there is ample time to do all the processing in real-time.
The Squirter
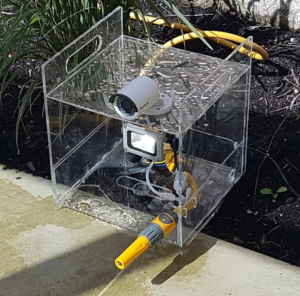
The final part of the work has been to build a box to house the following: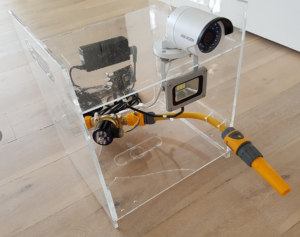
- Camera (I found that a reasonably cheap IP camera from HIK Vision worked well)
- Light to ensure the scene is well illuminated (I found that using a motion triggered light didn’t work as the camera took too long to stabilise to the new lighting – so the light is constantly on)
- Solenoid valve – the one I used is 12V but takes 2.5A and delivers a meaty thump when it opens. I tried a smaller one and it failed after a short time.
- Power supply – 12V 4A
- Control board – a Particle Photon with a MOSFET to drive the solenoid
- Nozzle, pipe and connectors from Hozelock
- Frame constructed from laser-cut acrylic sheet
The code for the Particle Photon is very simple – it just waits to receive a command over UDP (I’ve found this very reliable over my home network).
So far the squirter has come into action twice (one for each of the two main “bad” cats) and they haven’t yet (after a couple of days) returned. Unfortunately during testing both of our cats also got slightly wet but they seem much happier to be around the cat flap these days so things are looking up.

