Facial recognition has been in the news a lot lately with both Google and Amazon coming under fire from their own employees – and others – over the use of their services by intelligence agencies. The great news is that you can put the technology to work for your own purposes (nefarious or otherwise I guess) with little more than an online account and a few lines of code. So I decided to improve the RFID based door lock that we use at home with a facial recognition upgrade based on Amazon’s Rekognition service.
Disclaimer: I do not recommend using solely facial recognition for access control. It can be gamed very easily – e.g. by showing a photo of the valid person in place of their face – and in our case I have implemented a second factor in our door control system (which I won’t explain here for obvious reasons) to ensure a level of security more appropriate to the main door to your house.
About Face
Getting to the point where you can detect a face from a camera image is very straightforward. I followed the steps in this blog post on Amazon.com. The nice thing about this particular post is that it explains how to set up the trust and access policies that are required to enable the services used (which are Rekognition itself, S3 for reference image storage, and DynamoDB to store a link between image-id and a person’s name or other details). I’ve wasted a lot of time trying to use Amazon services where it wasn’t so obvious what security settings needed to be in place and I am particularly grateful to the blog author for taking the time be thorough.
Following all the steps – including the use of Lambas and S3-triggers to add additional facial images took me and my friend Andy a couple of hours to get to the first successful match of a face. After Andy left, a couple of quick additional hacks were applied to: (a) push images grabbed from a security camera into the system and (b) have a positive match open the front door. This enabled the evaluation for a month or two with the whole family as guinea-pigs.
Not so Fast!
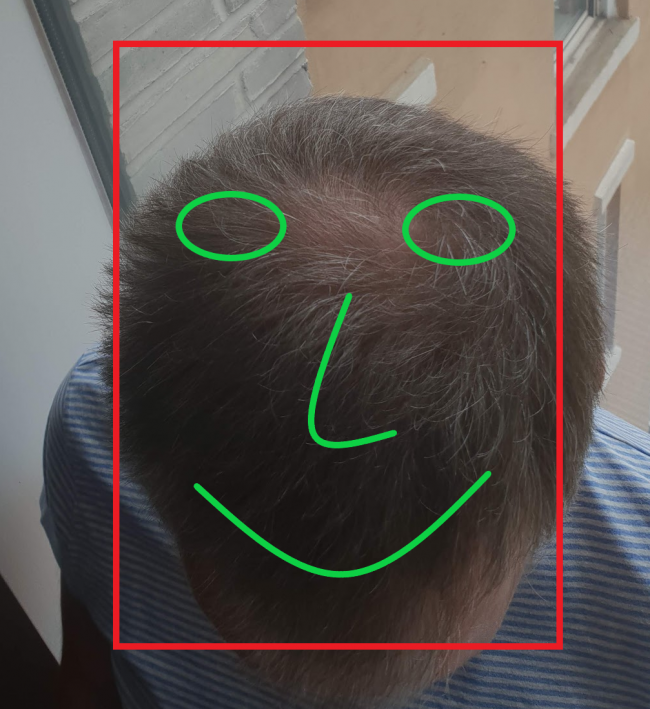
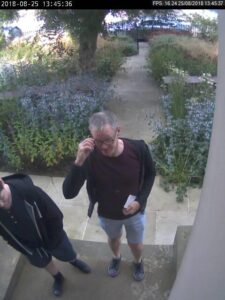
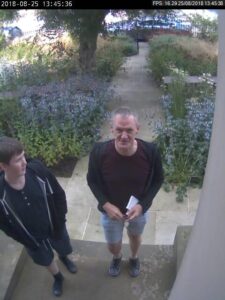
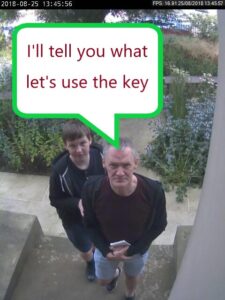
The feedback, unfortunately, was “mixed”. When it worked – and it seemed to work best for me for some reason – it was kind-of magical and allowed you to walk straight into the house without putting anything down or fishing around for a key/card. But it took quite a while to recognise anyone and you tended to have to stand around looking up at the security camera musing on whether it might work better if you smiled – or looked deadly serious. Furthermore there were some significant problems in low-light (and we’re heading in to winter in Edinburgh so there will be a lot of that!) and the position of the camera resulted in a lot of top-of-the-head shots which defied recognition even by me – although I am now a lot more familiar with my bald-patch and can recognise it at 50 paces.
It turned out that a big part of the problem was the manner of capturing images from the security camera – as well as the location. The CCTV system we have is based on an opensource product called iSpy (which is great by the way) and image capture in iSpy is based on triggers (such as motion). It turns out that the triggers can require quite a few frames of video before they, well, trigger. It isn’t a problem for iSpy as it buffers many frames and records video images from time before the trigger as well as after. But for my purposes it just slowed down the process and meant a lot of standing about and waiting. Also, the iSpy system doesn’t make any attempt to ensure that the frame that caused the trigger is not blurry or otherwise of poor quality as it is intrested in the whole feed and not just the single frame.
Coupled with the fact that the Amazon blog post demands that the presence of a face (as opposed to the recognition of the face) is also delegated to the Rekognition engine rather limits the practical rate at which images can be evaluated. It just doesn’t seem sensible to me to send the entire feed from the security camera up to Amazon so it could check whether there was a face on one frame in a million.
Rekognition Test
I also wanted to know just how good the recognition system could be with various different qualities of image. So I fed in around 1000 faces of people scraped from the internet interspersed with faces of my family captured from the video camera. The results were, frankly, astonishing. Despite the dire warnings, which are very valid, about the use of Rekognition (and similar services) by law enforcement due to false positives in very large datasets, I didn’t find a single error in the images I tested – all family faces which were not too blurry were correctly identified and there were no false positives.
However, as stated above, this method simply isn’t reliable enough to be the only factor in allowing access to your property. I would strongly advise more than one factor be used to ensure adequate security.
PyImageSearch to the Rescue
While I was pondering a way to improve the system I received an email from Adrian at PyImageSearch entitled “OpenCV Face Recognition [plus I got married over the weekend! 🍾🎉]”. His blog posts are excellent and I’ve backed his crowdfunded book projects too (although I can’t honestly say that I’ve found the time to read them yet – but surely it makes you smarter just to have thought about reading them doesn’t it?). Anyhow, his blog explained how to build a facial recognition system purely using OpenCV (which is a framework for computer vision that I’ve used before in my post The Good, The Bad and The Ugly and also in Playing 2048 with a Robot Arm) and I figured this would be worth trying since it was pretty clear that I would be much more in control of the process than simply delegating everything to Amazon Rekognition.
So I piled in, built his example code and set about training his neural net with my family’s faces. In terms of face detection all was well, the system located the face within the image much better than the Amazon Rekognition system and, since it was running locally on a fast machine connected to the same ethernet network as the security camera, it was able to keep up with the camera’s frame rate (about 25 frames per second) even starting at high resolution (1920×1080 – though this does get resampled down).
But sadly the reliability of recognition of faces (with the training set I used) seemed nothing like so high as using Amazon Rekognition.
Bring on the Hybrid
Despite not working “out of the box” the PyImageSearch article has led me to a very good working solution which incorporates the face detection system from PyImageSearch with the facial recognition solution from the Amazon blog post.
The software breaks down neatly into the FaceGrabber which, as its name implies, grabs frames that contain faces from a video feed and FaceRecogniser which recognises people in these frames.
The FaceGrabber simply does the following, repeatedly:
- Grab a video frame
- Resize the image to reduce computation
- Generate a blob from the image – this is a technique used to ensure that variations in illumination and colour sensitivity (amongst other things) are evened out among a set of sample images – note that the magic numbers used here are from the PyImageSearch article – I’ve made no attempt to change any of this
- Use the face detector from the PyImageSearch post – which is based on a Caffe model – the original source for this is in the opencv github repository
- For each face found:
- crop the image to just the face
- callback out of the face grabber to the FaceRecogniser passing the face found (more information below)
- if the face fits, perform whatever action is required – e.g. enable opening of a door, etc
class FaceGrabber():

    def __init__(self, videoSource, faceDetector, callback):
        self.videoSource = videoSource
        self.faceDetector = faceDetector
        self.callback = callback

    def start(self):
        # Start collection
        logging.info("Starting video stream...")
        vs = cv2.VideoCapture(VIDEO_SOURCE)
        time.sleep(2.0)

        # Loop over frames from the video file stream
        lastFaceMatchResult = None
        while True:
            # grab the frame from the threaded video stream
            frame = vs.read()[1]

            # resize the frame to have a width of 600 pixels (while
            # maintaining the aspect ratio), and then grab the image
            # dimensions
            frame = imutils.resize(frame, width=600)
            (h, w) = frame.shape[:2]

            # construct a blob from the image
            imageBlob = cv2.dnn.blobFromImage(
                cv2.resize(frame, (300, 300)), 1.0, (300, 300),
                (104.0, 177.0, 123.0), swapRB=False, crop=False)

            # apply OpenCV's deep learning-based face detector to localize
            # faces in the input image
            self.faceDetector.detector.setInput(imageBlob)
            detections = self.faceDetector.detector.forward()

            # loop over the detections
            for i in range(0, detections.shape[2]):
                # extract the confidence (i.e., probability) associated with
                # the prediction
                confidence = detections[0, 0, i, 2]

                # filter out weak detections
                if confidence > FACE_DETECT_CONFIDENCE_LEVEL:
                    # compute the (x, y)-coordinates of the bounding box for
                    # the face
                    box = detections[0, 0, i, 3:7] * np.array([w, h, w, h])
                    (startX, startY, endX, endY) = box.astype("int")
                    startX = max(startX-20, 0)
                    startY = max(startY-20, 0)
                    endX = min(endX+10, w-1)
                    endY = min(endY+10, h-1)

                    # extract the face ROI
                    face = frame[startY:endY, startX:endX].copy()
                    (fH, fW) = face.shape[:2]

                    # ensure the face width and height are sufficiently large
                    if fW < 20 or fH < 20:
                        continue

                    # the callback is used to recognise the face
                    person = self.callback(face)

                    # draw the bounding box of the face along with the
                    # associated probability
                    if person != "__REPEAT__":
                        lastFaceMatchResult = person

                    # Label the frame
                    text = "{} Face Confidence {:.2f}%".format(lastFaceMatchResult if lastFaceMatchResult else "Unknown", confidence * 100)
                    y = startY - 10 if startY - 10 > 10 else startY + 10
                    cv2.rectangle(frame, (startX, startY), (endX, endY),
                                  (0, 0, 255), 2)
                    cv2.putText(frame, text, (startX, y),
                                cv2.FONT_HERSHEY_SIMPLEX, 0.45, (0, 0, 255), 2)

            # show the output frame
            cv2.imshow("Front Door Face Detector", frame)
            key = cv2.waitKey(1) & 0xFF

            # if the `q` key was pressed, break from the loop
            if key == ord("q") or key == 27:
                break
And the FaceRecogniser():
- Check if we’re ready for another face – I’ve set a maximum rate at which faces can be submitted to Amazon Rekognition
- Get the face image into the right format to submit to Amazon
- Submit the face and request a match
- If a match is found then look it up in the DynamoDB database and return the result to the FaceGrabber which handles things from there on
class FaceRecogniser():

    def __init__(self):
        self.timeOfLastRekognitionRequest = None

    def readyForRequest(self):
        # Check we don't exceed max rate of requests
        if self.timeOfLastRekognitionRequest is None:
            return True
        if time.time() - self.timeOfLastRekognitionRequest > MIN_SECS_BETWEEN_REKOGNITION_REQS:
            return True
        return False

    def recogniseFaces(self, frameWithFace):

        # Requesting now
        self.timeOfLastRekognitionRequest = time.time()
        try:
            newFaceName = FACE_CAPTURE_FOLDER + "/newface.jpeg"
            cv2.imwrite(newFaceName, frameWithFace)
            image = Image.open(newFaceName)
            stream = io.BytesIO()
            image.save(stream, format="JPEG")
            image.close()
            image_crop_binary = stream.getvalue()
        except Exception as excp:
            logging.warning(f"recogniseFaces: Can't open {str(excp)}")
            return None

        try:
            # Submit individually cropped image to Amazon Rekognition
            response = rekognition.search_faces_by_image(
                CollectionId='family_collection',
                Image={'Bytes': image_crop_binary}
            )
        except rekognition.exceptions.InvalidParameterException as excp:
            logging.warning(f"recogniseFaces: InvalidParameterException searching for faces ..., {str(excp)}")
            return None
        except Exception as excp:
            logging.warning(f"recogniseFaces: Exception searching for faces ..., {str(excp)}")
            return None

        person = "ZeroMatches"
        if len(response['FaceMatches']) > 0:
            person = "UnknownMatch"
            # Return results
            # logging.debug('Coordinates ', box)
            for match in response['FaceMatches']:
                face = dynamodb.get_item(
                    TableName='family_collection',
                    Key={'RekognitionId': {'S': match['Face']['FaceId']}}
                )
                if 'Item' in face:
                    person = face['Item']['FullName']['S']
                    if doorController.openDoorIfUserValid(person):
                        break
            logging.info(f"recogniseFaces: faceId {match['Face']['FaceId']} confidence {match['Face']['Confidence']} name {person}")
        else:
            logging.info(f"recogniseFaces: no matching faces found")
            self.renameFaceFile(newFaceName, person)
        return person
The Boring Admin
Finally a few words about the boring job of keeping the facial database, updating it, etc.
I decided that rather than do a lot of work building a system to manage images on the various Amazon systems (e.g. making sure the S3 images were correct, adding and removing images from Rekognition and ensuring every image had a record in DynamoDB) I would simply blast all previous data whenever image changes were made and rebuild the whole lot from scratch each time. To facilitate this requires just a folder structure (a root containing one folder for each person with as many images as felt necessary in each person’t folder) and a single script to dump all the data in the Amazon buckets, database and service and then (re)submit the whole lot in one go.
And the Exciting Source 🙂
All the source code for the project is here.
Have fun!

