Having spent a bit of time on the hardware for my new SandBot design I decided I needed to revamp the software to bring it up to scratch. My main goals were as follows:
- Make it easy to create and run geometric patterns
- Find a simple way to provide a human interface to the SandBot
- Ensure the software was reasonably robust and could run continuously for days
I’m really happy with the result, I’ve built software that hosts a website on the SandBot and that allows patterns to be created with simple trig. To have the SandBot produce the pattern just requires touching (or clicking) the required pattern on the home page. Patterns can also be edited (using the pencil icon) and new patterns created (using the +).
Shifting Sands
Defining a new pattern for the SandBot to draw is something I’ve put quite a bit of effort into. For instance the screen grab below shows how a spiral can be created using some simple calculations. If you recall that a circle can be described by sin() and cos() then it should be reasonably easy for me to explain how this creates a spiral …
There are three sections on the form for creating a new (or editing an existing) pattern: Name, Setup expressions and Loop expressions. The Name is pretty obvious and just names the pattern.
The Setup expressions form a list where each expression is a simple formula and these are evaluated as soon as the user presses a button on the home page to start the formation of a pattern on the SandBot. For instance in the screen grab below there is one expression which is “t = 0”. So, unsurprisingly, when the user presses the “Spiral” on the home page: internally the software sets the value of something called “t” to zero.
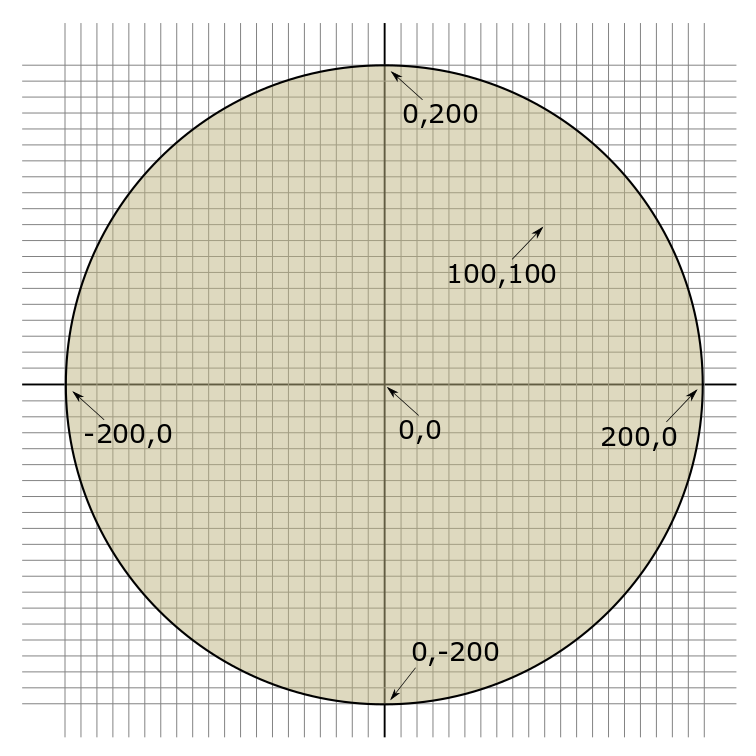
The Loop expressions are more interesting. They are evaluated in what is called (in software) a “loop” – which basically means doing the same thing over and over again. The first time they are evaluated is just after the Setup expressions and they are responsible for telling the SandBot where to draw. On subsequent occasions they are evaluation when the SandBot is ready for more instructions about where to go next. So, to continue the example, the value of “x” will be set by the first Loop expression and the value of “y” will be set by the second one. These two values for “x” and “y” are special as they tell the SandBot where to send the ball-bearing to next as shown on the diagram below. I’ll explain further what these particular lines do in the next section – along with the other two lines we haven’t talked about.
Spiraling In
The pattern we have defined above is, of course, a spiral. When the SandBot draws this shape it begins with the ball-bearing at the outer edge of the table and moves around the table clockwise in ever decreasing circles towards the centre. Let’s have a look why it does this…
We now know that the value of “t” is set initially to 0 and we can see from the third line in the Loop expressions that “t” is made a little bit bigger each time around the Loop. That’s what the expression t = t + 0.01 means, basically make t bigger (by 0.01 in this case). You could consider “t” to represent the time it has taken the SandBot to draw the spiral up to a certain point. So the first point of the spiral is at time 0 (like zero hour) and the next point is at time 0.01 – just a little bit later on.
Hopefully this makes the first two lines make a little more sense. When we draw a circle using sin() and cos() values we are basically working out where each point on the circle is and then moving round the circle a little and doing it again. The top of the circle corresponds to t = 0 and at this point x = 0 and y = the radius of the circle (which is 190mm for the this example – and a little bit in from the very edge of the sand table which has a radius of 200mm). A little time later t has moved on, lets say t = 0.1 in this case and the point calculated will be on the spiral that goes round clockwise from the previous point.
The final line of the Loop expressions is “stop = t==10”. Now this will take a little more explanation since it combines two ideas, the first being that there is a value called “stop” which has a special meaning to the SandBot. Whenever “stop” has a value which is not zero the SandBot stops drawing. The other idea in the line “stop = t==10” is the use of the == sign to mean “test whether something has a particular value and give me a zero if it doesn’t and something other than zero if it does”. So we’re testing to see if “t” is exactly equal to 10. If “t” isn’t equal to 10 then stop will get the value zero. But if “t” is 10 then “stop” will get a value that isn’t zero (it doesn’t matter what that value is – it just matters that it isn’t zero) and the robot will stop drawing.
Continuous Motion
Another section in the user interface is the Sequences section. This looks just like Patterns on the front page and you can start a sequence, edit it and create a new one in just the same way as for patterns. The idea of sequences, however, is that you list a set of patterns and the SandBot generates each in turn and then returns to the start, so you can run indefinitely with constantly shifting sands.
Expression Evaluation
Perhaps the most interesting thing in the software is the expression evaluator – i.e. the piece of code that actually computes the value of expressions like “y = 190 * cos(t)”. if you are writing software using a compiler (as most software of this kind is written) then you can include computations like sin() and cos() at compile-time but you can’t easily string them together in formula at run-time. So a piece of code called an expression evaluator is needed. The job is generally split into two phases “parse” and “evaluate”. The “parse” phase involves running through the formula and detecting variables (things like y and t in the example above), functions (cos in this example), constants (190) and operators (the * and =). These are split into a tree structure so that it is quick to move from one part of the expression to the next and the structure of the expression is maintained.
I used a third-party expression evaluator called tinyexpr which does the parsing (its called compile in tinyexpr) job well and is written for microcontrollers with small amounts of memory. However, I needed to extend it a little to add the ability to define variables and evaluate boolean values with operators like ==. My code is in the PatternEvaluator.h file and the section which parses (compiles) an expression and stores the elements is shown below.
// Compile expression
int err = 0;
te_variable* vars = _patternVars.getVars();
te_expr* compiledExpr = te_compile(outExpr.c_str(), vars, _patternVars.getNumVars(), &err);
// Store the expression and assigned variable index
if (compiledExpr)
{
    VarIdxAndCompiledExpr varIdxAndCompExpr;
    varIdxAndCompExpr._pCompExpr = compiledExpr;
    varIdxAndCompExpr._varIdx = varIdx;
    varIdxAndCompExpr._isInitialValue = isInitialValue;
    _varIdxAndCompiledExprs.push_back(varIdxAndCompExpr);
    Log.trace("PatternEval addLoop addedCompiledExpr (Count=%d)\n", _varIdxAndCompiledExprs.size());
}
And here’s where an expression is evaluated:
Log.trace("PatternEval numExprs %d", _varIdxAndCompiledExprs.size());
// Go through all the expressions and evaluate
for (unsigned int i = 0; i < _varIdxAndCompiledExprs.size(); i++)
{
    // Variable index and type
    int varIdx = _varIdxAndCompiledExprs[i]._varIdx;
    bool isInitialValue = _varIdxAndCompiledExprs[i]._isInitialValue;
    // Check if it is an initial value - in which case don't evaluate
    if (!((isInitialValue && procInitialValues) || (!isInitialValue && procLoopValues)))
        continue;
    // Compute value of expression
    double val = te_eval(_varIdxAndCompiledExprs[i]._pCompExpr);
    _patternVars.setValByIdx(varIdx, val);
    Log.trace("EVAL %d: %s varIdx %d exprRslt %f isInitialValue=%d\n",
            i, _patternVars.getVariableName(varIdx).c_str(), varIdx, val, isInitialValue);
}
The Sand UI Software
I mentioned at the start that the SandBot creates a web server and that the page used to control the SandBot is generated by that server. This means that the SandBot must be on your WiFi network in order to work and I’ll explain how that can be done later on. But first let’s have a look at the HTML file that creates the web pages we’ve seen above.
Since the whole visible page is generated in javascript the body section of the HTML is absolutely minimal:
<body onload="bodyIsLoaded()">
  <div>
    <div id="pageHeader"></div>
    <div id="pageBody"></div>
  </div>
</body>
Even the buttons are generated from SVG code and this allows the page to be contained in a single HTML file which reduces the burden on the web server.
...
if (label === "Add")
{
  oStr += '<svg xmlns="http://www.w3.org/2000/svg" version="1.1" width="25px" height="25px" viewBox="170 60 200 150">';
  oStr += '<g><path style="fill:none;stroke:#e0e0e0;stroke-width:22;stroke-linecap:round;"'
  oStr += 'd="m 250,50 0,150 m 75,-75 -150,0" />';
  oStr += '</svg>';
}
...
In keeping with all web pages there is no state stored in the page itself. So when the page is first shown it goes back to the server and uses a REST API “/getsettings” to access the current state of the robot.
function updateDisplay()
{
  callAjax("/getsettings", sandTableInfoCallback);
}
And the information requested is returned in JSON.
{
  "robotType":"SandTableScara",
  "patterns":
  {
    "Spiral":
    {
      "setup": "t = 0\n",
      "loop": "x = (190 - t * 10) * sin(t)\ny = (190 - t * 10) * cos(t)\nt = t + 0.01\nstop = t==10\n"
    },
    "Leaf Pattern":
    {
      "setup":"",
      "loop":""
    }
  },
  "sequences":{},
  "name":""
}
Particle vs Espressif
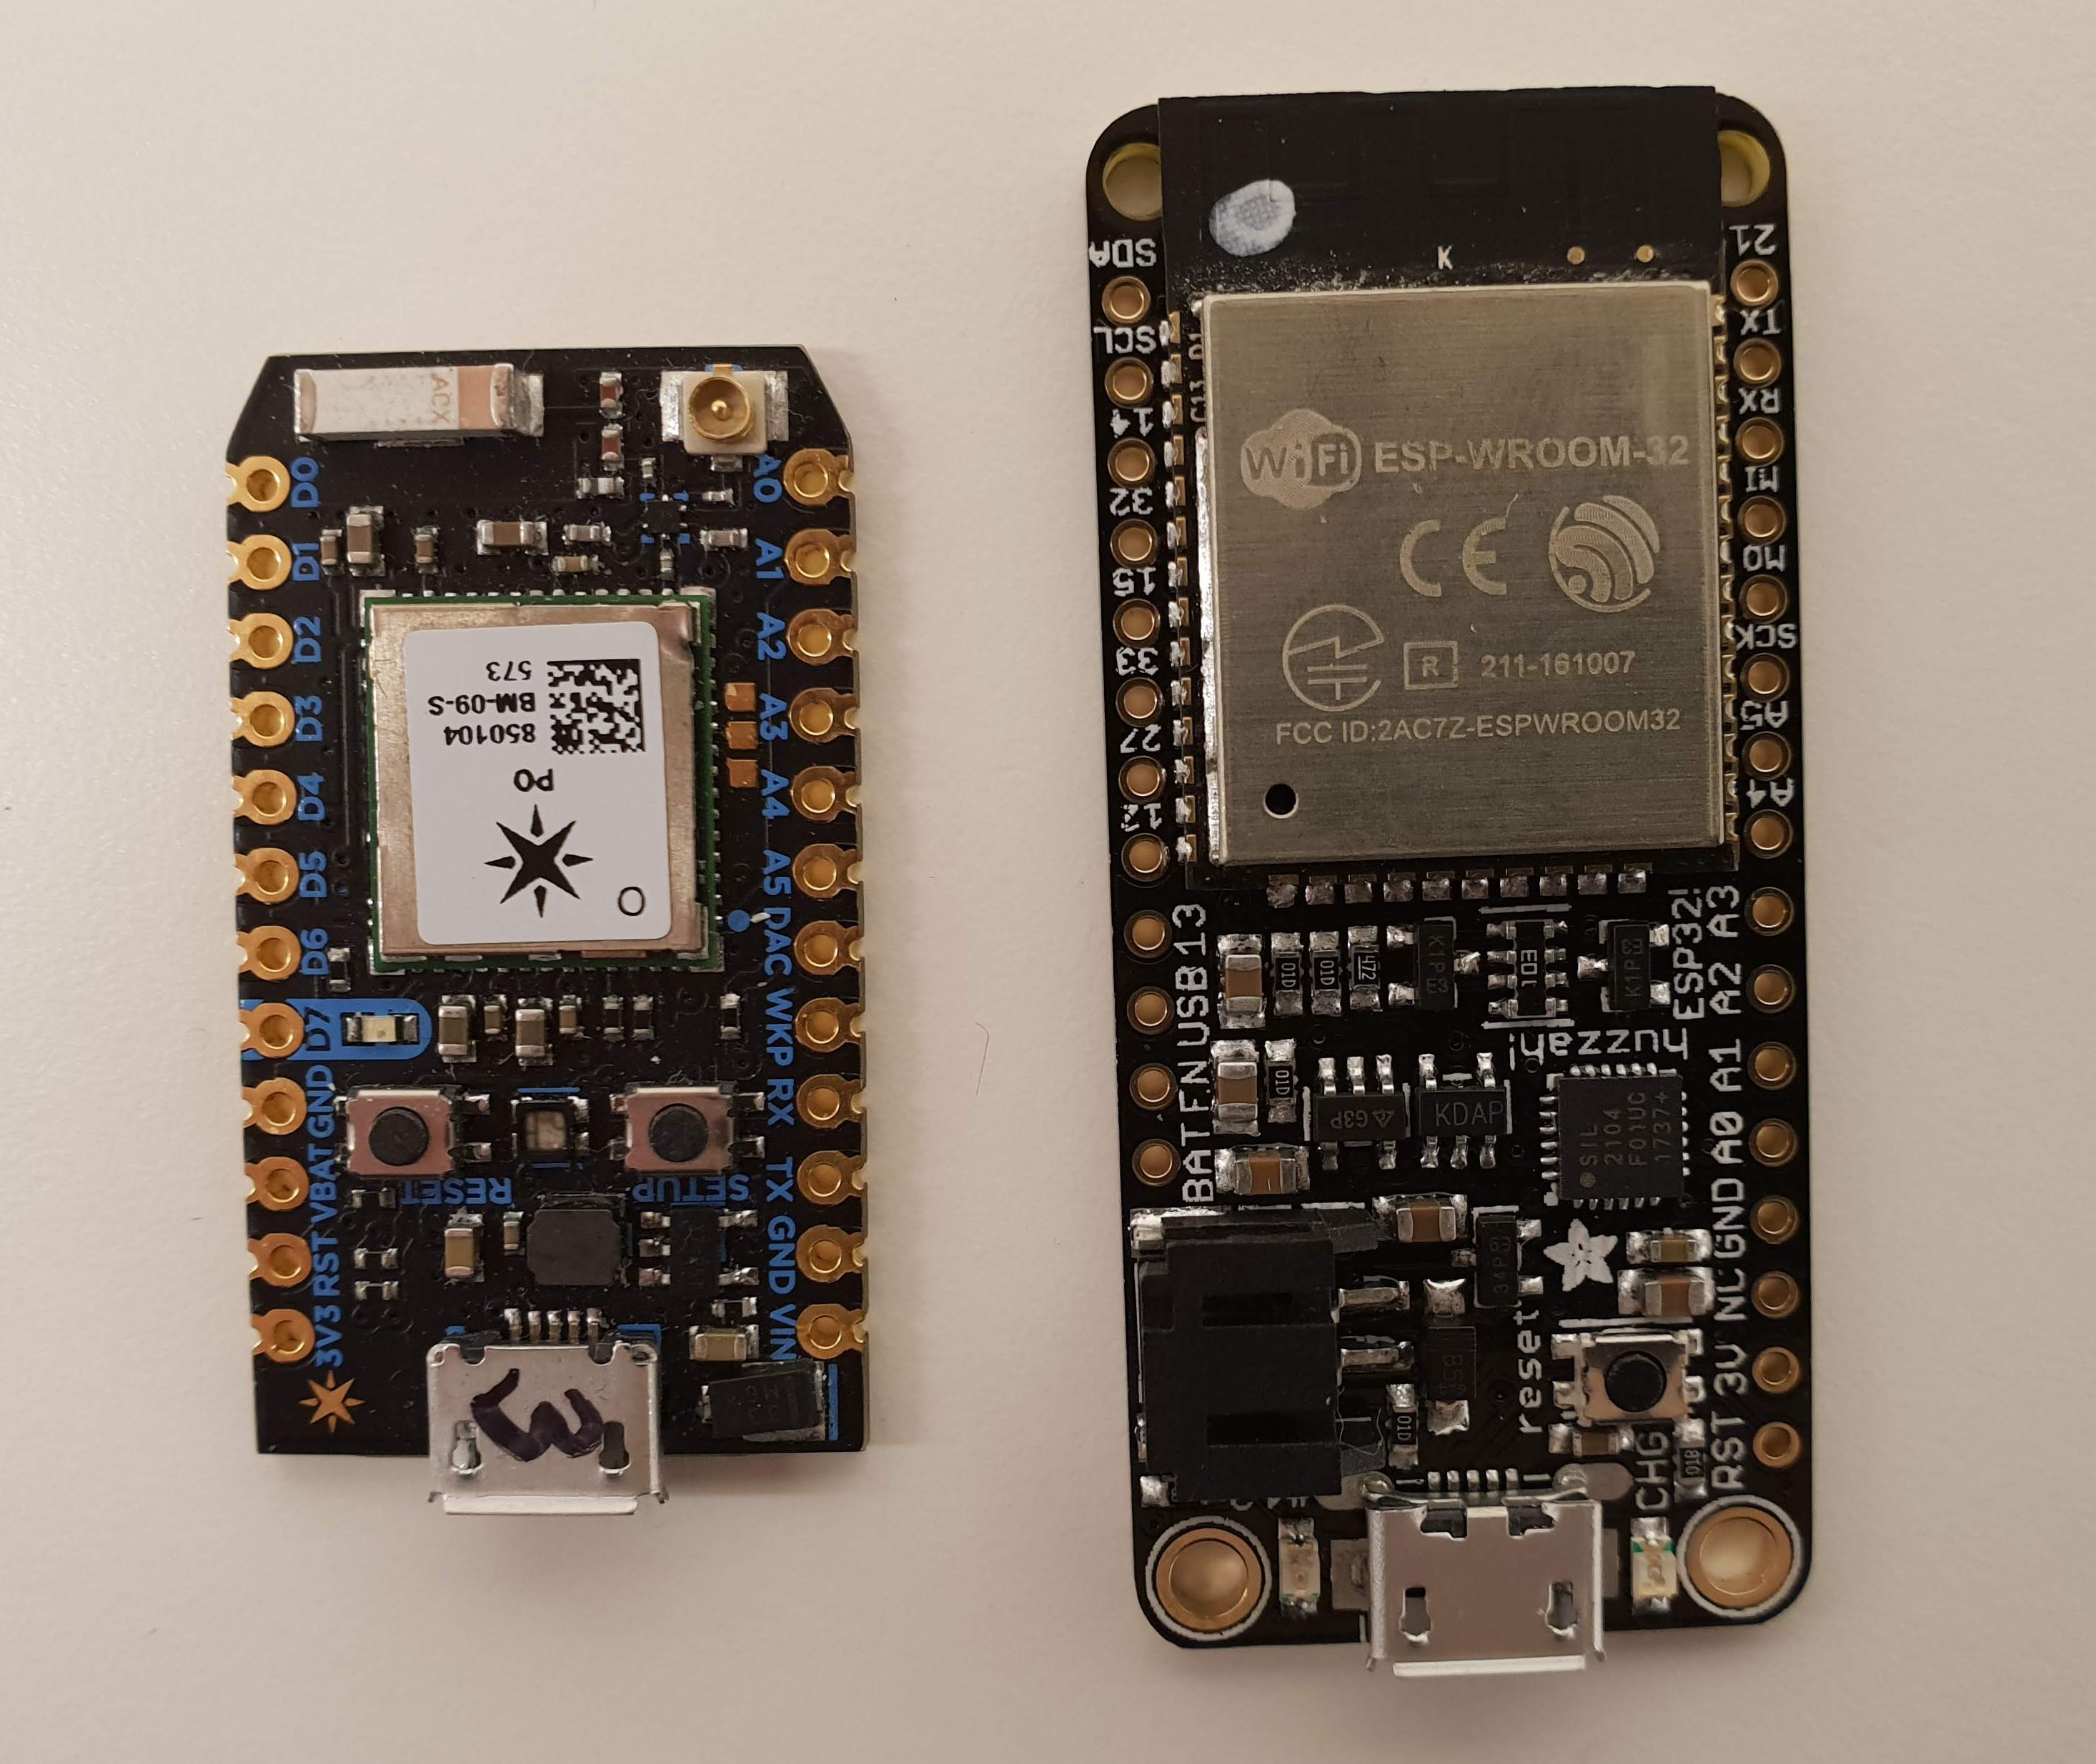
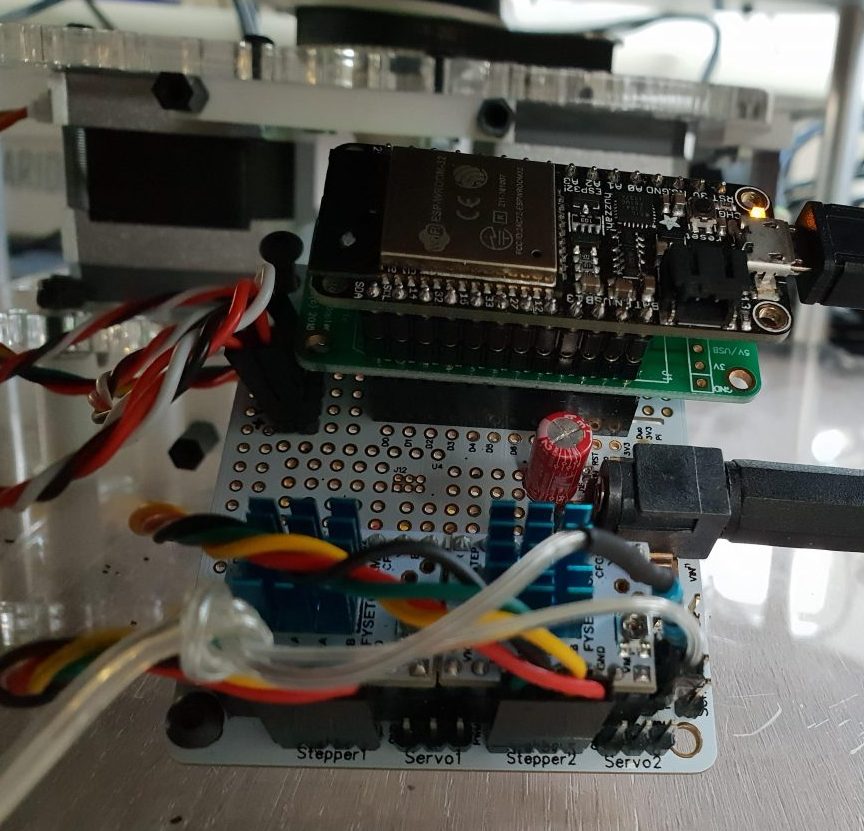
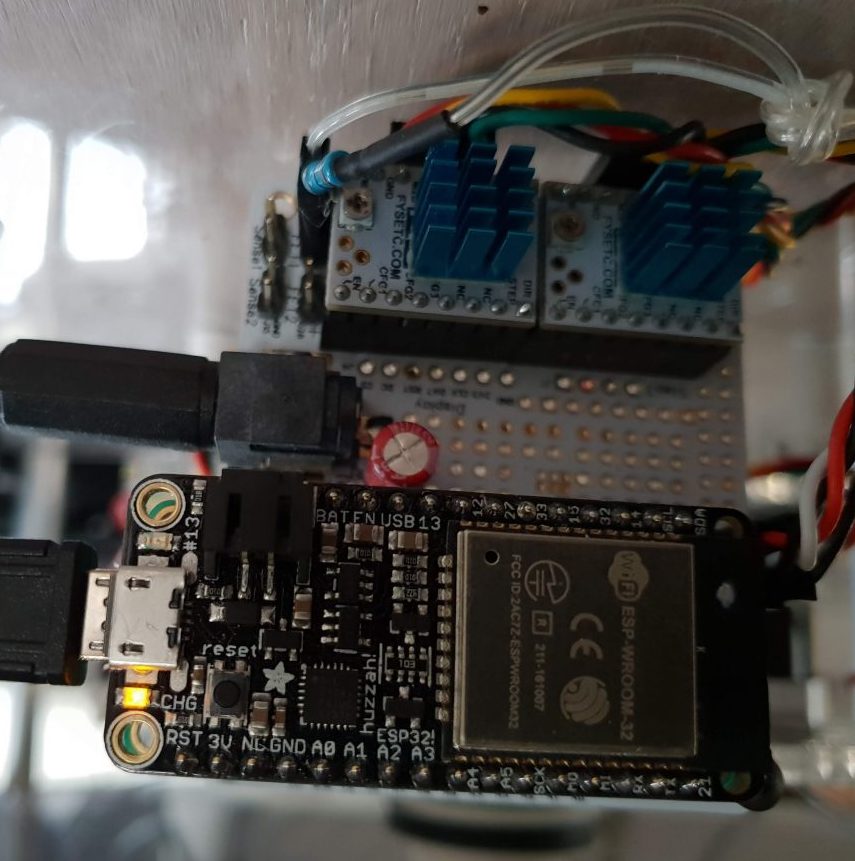
Now one of the things that I haven’t explained so far is that I have two versions of the firmware for the SandBot. My original firmware – which still works fine – is based on the Particle Photon which is a small microcontroller board based on an ARM Cortex M3 with WiFi + 1Mb flash and 128K RAM. The newer version is based on the Adafruit Huzzah32 based on a module called Espressif ESPWROOM32 which is also a small (though somewhat bigger as you can see in the photo) microcontroller board with WiFi but this time based on a processor from chinese company Espressif and with a larger flash (4Mb), a lot more RAM (520KB) and dual cores.
The main reason for wanting to re-do the firmware was to enlarge the number of patterns that can be stored on the device and also because I had had some issues with WiFi stability although this now appears to have been due to my own WiFi setup at home.
The two versions are in the software repository in the folders “ParticleSw” and “PlatformIO” and they share the same code for their WebUI.
Code Structure
In the reorganization of code that I did in working on the ESP32 version I moved a lot of code into libraries. This included the WiFi manager and REST API management as well as code to handle common tasks such as JSON parsing and debug logging. In addition the ESP32 version relies on a very good third party which provides an asynchronous web server on ESP32.
The code to run the robot itself is based around the idea of a workflow and a pipeline – each being a queue but at different levels. So the workflow works at the level of a command and may include GCODE statements that directly request movement of the robot arm to a specific X,Y position. The purpose of the workflow queue is to allow lots of these commands to sit waiting to be actioned so that there is always a command ready to perform next and the robot doesn’t “stutter” between movements. Each command is then broken down into smaller movements to ensure that motion isn’t “jerky”. In the SandBot the pipeline deals with individual movements of 1mm each. By splitting any motion into such small segments the geometry of the robot (which is intrinsically circular) doesn’t corrupt the linear motion that is expected when the robot is instructed to move from one X,Y point to another.
Planning Motion
When motion is needed between two points it is handled by the MotionPlanner. Its job is to ensure smooth transitions from acceleration, through continual motion at (up to) a maximum speed and finally into deceleration as needed. To do this the motion planner uses a look-ahead and look-back model to set the optimum profile of motion across different blocks in the pipeline.
Consider what happens when the robot is stationary and then ten blocks are added to the pipeline which all demand motion that is in a straight line (or a gentle curve). In this case the robot needs to start accelerating while it is processing the first few blocks (as each block is only 1mm long it will not get up to maximum speed for about 5 blocks) and then level off the speed when it reaches the maximum desired. It then needs to look ahead to see if more blocks have been added to the pipeline and if the straight line (or gentle curve) is continuing or if a more abrupt change of direction (or hard stop) is required. In each of these cases the MotionPlanner needs to take the appropriate action: either continuing at a constant speed or decelerating to enable a change of direction (or stop).
Code to perform this task is commonly found in 3D printers (e.g. Marlin firmware for Arduino) and CNC machines (e.g. GRBL). I could have used the code from these places but instead I decided to build my own planner with the idea that I would split the code into suitable sections so that driving a more capable stepper motor controller (like the TMC5072 which has its own motion controller built in). It was quite an interesting challenge to build a capable MotionPlanner and I think I’ve found a few ways to improve on the designs in the Marlin and GRBL versions – albeit at higher cost in instruction time as my calculations are more complicated – but this doesn’t really matter as the ESP32 is a much more capable processor than the 8 bit designs running most 3D printers.
Getting the software onto the Bot
The procedure for getting the SandBot software onto the SandBot microcontroller is different in each case (Photon or Huzzah32).
In the Photon case the easiest way I have found is to download the Particle Dev (desktop IDE) and use it to open the ParticleSw folder from my github repository. Connect the Photon with a micro USB cable and the use the “lightning strike” button in the Particle Dev UI to flash the firmware into the Photon – see the Flashing device section of this document.
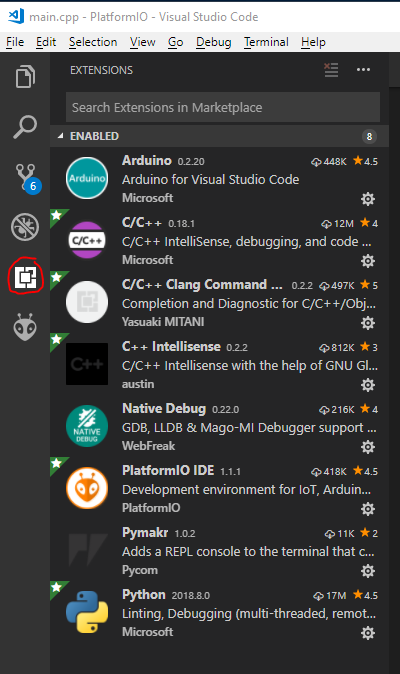
In the Huzzah32 case I have found PlatformIO to be the best way to get going. Follow the instructions here – I use Microsoft VS Code – and once PlatformIO is set up you can add the Arduino extension (click the circled button in the image below).
Now, in Visual Studio Code, open the project folder which is called PlatformIO in the github repository. The board and library requirements are described in the platformio.ini file which is in the root of the PlatformIO folder in the github repository so they should be set automatically without you having to make changes.
Finally you will need to program the Huzza
h32 using the forward-facing arrow in the toolbar at the bottom of the PlatformIO screen. One thing to watch out for is that I sometimes hard-code the upload_port setting in the platformio.ini file. If this is set and you only have one serial device connected then comment this line out – otherwise change the port to the one you need.
In either case you can use the following details to check that the firmware is loaded correctly.
Getting on the Net
Once the SandBot is connected to your WiFi network you can use the web UI as described above and all the functions of the SandBot are available through that UI. However, I haven’t yet described how to connect the SandBot to WiFi or how to find the web address where you can access the UI once you are on.
Getting SandBot onto your WiFi network is most easily done through the USB connection on the Particle Photon or Adafruit Huzzah32 boards. In the case of the Photon you may already have got onto the WiFi network using the “getting started” procedure recommended by Particle and in that case all you need to do is find the IP address as described below.
In either case:
- Connect a normal micro-USB cable to the USB connector on the Photon or Huzzah
- Download a “terminal emulator” software – my favourite is TeraTerm
- Install the terminal emulator and run
- Open the Serial Port Setup in the terminal emulator and select a port (the one the Photon or Huzzah is connected to) and baud-rate of 115200
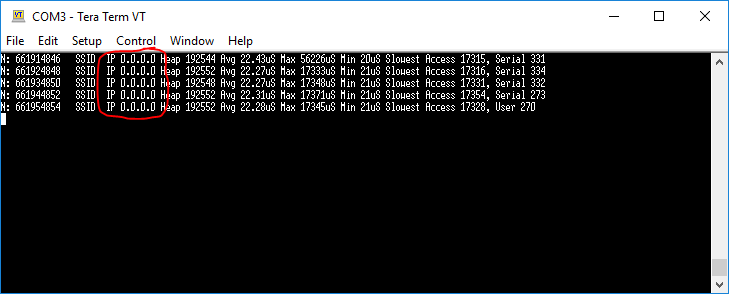
At this point you should see information coming from the SandBot as shown below. If you don’t then it would be a good idea to ensure that you have programmed the flash memory of the device correctly.
The screen grab shows the situation where the SandBot has no current WiFi connection – you can tell this is the IP section of the listing shows 0.0.0.0 as it does in the image above shown circled in red. If you do see an IP address listed that is not 0.0.0.0 then you can ignore the remainder of this section if you want to – however the section does explain how to give a name to your SandBot and, in the case of browsers like Chrome, this can allow you to refer to your SandBot by a name you give it rather than the IP address when you type it into your browser’s address bar.
To give your SandBot an IP address you use a command which you type into the terminal emulator. Note that while you are typing the command the normal logging of debugging information continues so it can be a bit tricky to see what you have typed. However, it will be interpreted correctly if you get it right and you can just try again if it doesn’t work. So enter the following command and press enter afterwards:
w/SSID/PASSWORD/HOSTNAME
Replacing:
- SSID with the name of your WiFi network (mine is rdint01 as you will see in a screen grab below)
- PASSWORD with your WiFi password
- HOSTNAME with the name you want your sandbot to be called
You should see something like the following:
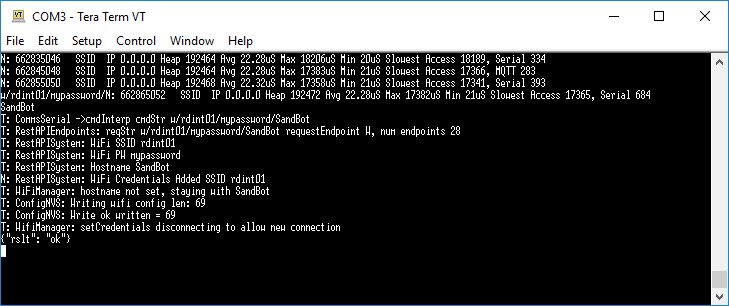
The command I typed starts on the fourth line and I used “mypassword” for the password – which of course isn’t my password but you get the idea. The debugging line interjected before I’d finished typing so the name I typed for the HOSTNAME which was SandBot appears on the following line. Assuming you actually did enter your SSID and password correctly you should see:
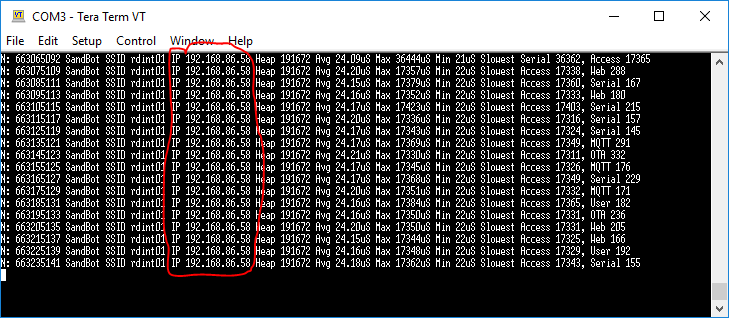
The IP address that has been assigned to the SandBot (192.168.86.58) is shown circled in red.
Getting to the UI
The information shown in the screen grab above includes the IP address of the SandBot (circled in red) and that is all you need to connect to it and see the web UI. In a browser such as Chrome enter the IP address in the following form:
http://192.168.86.58
Replacing 192.168.86.58 with whatever the IP address of your SandBot is. You should be greeted with the web UI and you are good to go.
Smooth Sand Art
One of my main concerns when creating the SandBot was to ensure that it was quiet and that the motion was very smooth. In order to achieve this I’ve used Trinamic SilentStepStick stepper motor controllers on my PCB.
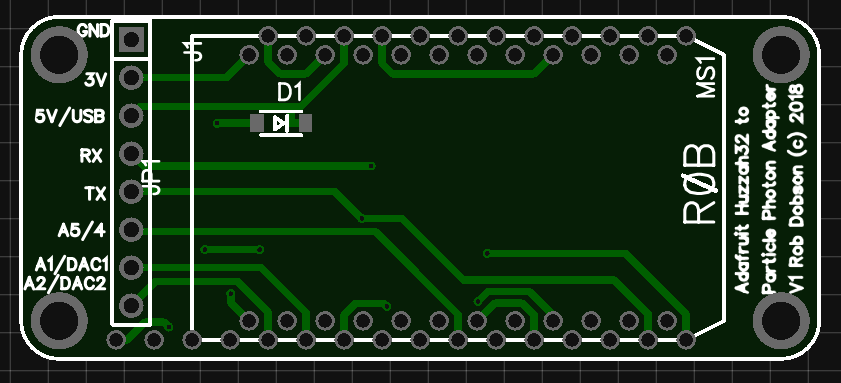
Also, in order to avoid creating a special PCB for the ESP32 version I’ve designed a board to convert from Particle to Huzzah pinouts. This is available on EasyEDA here: https://easyeda.com/robdobsn/Huzzah32ToParticle
Resources
And the main PCB is here: https://easyeda.com/robdobsn/Pi_Stepper_Hat-iZzxFXf9q
And finally the software is here: https://github.com/robdobsn/RBotFirmware


